- Continue Shopping
- Your Cart is Empty
What is an Inventors Workshop?
 I've blogged about the Inventors Workshop that we offer through the Glebe Neighbourhood Activities Group before . But what I haven't shown you are the results! This fall we have two sessions of the Inventors Workshop. Mondays after school for the 6-8 year olds and Thursdays after school for the 9-12 year olds. We have a longer session so we have a chance to cover more aspects of the inventive process. The workshop starts next week and there's still spots available so register now!
Fall 2014 Workshops and Events
Fall 2014
Imagine Eddy, September 20, 10 AM - 5PM
Join us for Imagine EDDY at the Espace bidouilleurs et << Makers >>. We'll have tables set up with some of projects and kits, and we'll be building Doodlebots too! imagineeddy.ca

GNAG Inventors Workshop, September 22 - Dec 15
We're running two afterschool Inventor's Workshops this fall through the Glebe Neighbourhood Activities Group. Mondays for 6-8 yrs old, and Wednesdays for 9-12yrs old. In this fun class we learn how to keep and inventor's log book to write down our ideas as work towards creating our own inventions. Registration starts September 5.

New! ABC Ottawa Take-off, October 25
This fall we have a 5 week Maker Workshop through the Association for Bright Children's Take-off program on Saturday mornings. We'll be working a series of five projects exploring conductivity and simple circuits. Registration night is October 2, 7:30pm, at the Ron Kolbus Lakeside Centre.

What we did for summer vacation
Eureka!
It was back to school here yesterday. The boys were nervous and excited to head back to class. We've had a great summer. It has been a whirlwind of activity as we've vacationed, visited and "workshop-ed" our way around the province. I mentioned the Eureka! summer reading program in a few previous posts here and here, but today I got to sit down and take a look at what we did.

- This was on the sidewalk leading up to the Lucknow library. Thanks for the welcome!

We were thrilled to be able to take our summer workshops to an astonishing 22 libraries. We worked with 280 + kids to help them successfully create their projects and teach them something new.

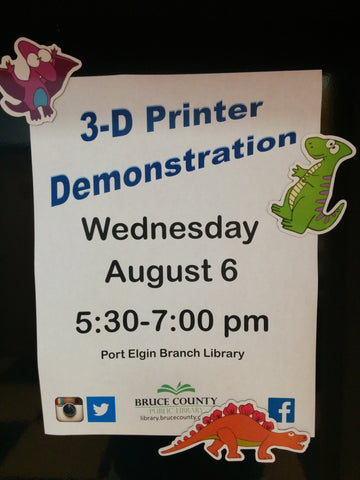
- Sign for our workshop in Port Elgin.

Some of the areas we visited were very rural. In Chesley, I was surprised to be parking across from a horse-drawn carriage outside the library. So many of the libraries we visited were curious about the maker movement and trying hard to bring new technology to their area. As we walked down empty main streets to the local library branch, it was easy to see what a vital role the library plays in bringing new resources into small towns. These tools that are associated with the maker movement have such potential. And the library can be instrumental in providing access to them.
3D Printing
We were very excited when Young Maker lent us a 3D printer to take with us on our tour. Most of the people we talked to had heard of 3D printing but have not had an opportunity to see one in action. It was lots of fun to demo. Nanik, in particular, has been very curious about the technology and dove right into it. More on that soon.
- We were happy to introduce 3D printing to the crowd that showed up.

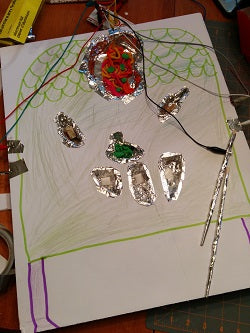
Sumo Doodles
One of the highlights of the summer for me was the Doodlebot workshop at the Kemptville Library. We had a full class of kids of various ages. It was a nice, bright, open space with lots of room to work. And we had a little extra time and lots of helpers. One helper for every 3 kids. That made it possible to conduct a completely open workshop - my favorite kind - with very little instruction and giving only requirements. I did show them how to attach the wires to the motor, but that's about it. I don't usually do this with the wide range of ages and distribution we had that day. But because we had so many excellent helpers, we were able to provide guidance and watch for frustration. With incredible success! The room was large enough that we were able to have a couple of tables of sumo doodles off to the side for the kids who finished first. I think it's fair to say we all had a wonderful time.

- Sumo doodle!

My favorite new book
Speaking of watching for frustration, I need to tell you about my favorite new book. I opened almost every workshop this summer reading "The Most Magnificent Thing", by Ashley Spires.
The Most Magnificent Thing Book Trailer from Kids Can Press on Vimeo.
Reading the book at the start of a workshop gave the kids a chance to collect and focus. I love this book because it talks directly about the frustration you can feel when making. ( I can't confirm, but this book may have actually been written about me.) Even better, it gives a plan for dealing with it. I love the language. I totally get it when the little girl's hands "feel too BIG to work, and her brain is too full of all the not-right things." And the kids get it, too. I like this book because it gives me a chance to talk to the kids before they begin making about frustration. About recognizing frustration and about plans for dealing with it - like taking a deep breath, walking around the room, seeing what other kids are doing. It is also a chance to emphasize iteration and collaboration. How making is not about being first, but working together and sharing what we know. This book is a great way to open a workshop and start a conversation about making
Ottawa Mini Maker Faire
And of course, I can't talk about the summer without mentioning the Ottawa Mini Maker Faire. It was great to participate in our hometown event. We're already looking forward to next year. I've covered everything before, but hey, did I mention, we were on TV? Definitely a highlight for us!
Ottawa Mini Maker Faire 2014
 The Ottawa Mini Maker Faire was held August 16-17 at the Canadian Science and Technology Museum. This was the fourth annual faire and it gets bigger every year. Last year we were in a room inside the museum and a tent in the parking lot. This year we were completely inside the museum. There was the big room, like last year, and a new "Make it Space" back behind the locomotives. We were in the "Make it Space", geared to hands-on, interactive presentations. It was a busy couple of days! I'm going to stop trying to explain it all - here's a
TV clip
that did a great job, with our own Hari leading the way!
The Ottawa Mini Maker Faire was held August 16-17 at the Canadian Science and Technology Museum. This was the fourth annual faire and it gets bigger every year. Last year we were in a room inside the museum and a tent in the parking lot. This year we were completely inside the museum. There was the big room, like last year, and a new "Make it Space" back behind the locomotives. We were in the "Make it Space", geared to hands-on, interactive presentations. It was a busy couple of days! I'm going to stop trying to explain it all - here's a
TV clip
that did a great job, with our own Hari leading the way!
Light it up - Duct Tape
* This is an article I sent out in our spring newsletter. Have you signed up for our newsletter yet? It comes out monthly with news, events and project ideas. You can sign up for our newsletter here: http://eepurl.com/GMbrX *
At World Maker Faire NYC I was inspired by Rachel Hallenga's exhibit Duct Tape Bling. Kids love duct tape. The bright colors and patterns are irresistible. Throw in some LEDs, batteries and conductive thread, put some velcro on the table, and all sorts of interesting wearables start to emerge. The project I use to get kids started is a light up cuff. Some of the kids have been working with me a while and have started using parallel circuits. We work on the sticky side of the duct tape. Here's what it looks like:

- Sticky side up

I like that you can stick the tails down on the duct tape to avoid short circuits. Leave the thread hanging past the tape to make the switches. Test the circuit to make sure it lights up before you put a backing piece of duct tape on.
The switches are fun. I like to use sticky velcro. Making the thread cross in opposite directions ensures a connection. Staples are a good idea. Sometimes the velcro is stronger than the adhesive holding it to the duct tape. If the staples are conductive, they can help make the connection for your switch.

- Conductive thread and velcro switch

But that's how I do it. As usual, the kids have way more interesting projects than I do!

- Duct tape projects

Keep making!
Alison
Bruce and Grey Counties: 8 Libraries, 5 Days
 The kids and I are just back from our whirlwind tour of Bruce and Grey counties last week. We managed to visit 8 libraries in just 5 days - Meaford, Port Elgin, Tara, Chesley, Lucknow, Teeswater, Walkerton and Owen Sound. We introduced kids to conductive paint, basic duct tape wearables, and vibration and movement with our doodling robots. Many thanks to
Young Maker
for lending us their 3D printer - we were excited to bring 3D printing demos in to some of these libraries as well.
The kids and I are just back from our whirlwind tour of Bruce and Grey counties last week. We managed to visit 8 libraries in just 5 days - Meaford, Port Elgin, Tara, Chesley, Lucknow, Teeswater, Walkerton and Owen Sound. We introduced kids to conductive paint, basic duct tape wearables, and vibration and movement with our doodling robots. Many thanks to
Young Maker
for lending us their 3D printer - we were excited to bring 3D printing demos in to some of these libraries as well.
Bringing Making Out of the Makerspace: Part III
* This is an excerpt from a presentation I made at Maker Faire, in San Mateo, on May 18 called "Bringing Making Out of the Makerspace". I'll be posting excerpts from that presentation this summer. I started with this post, Part I, and this post, Part II. *
Ready... Set
Once I'm in the classroom, the energy starts to rise. The kids know something different is about to happen and they are ready to go. But before we start making, there's some groundwork that has to happen. This is where we cover vocabulary – this helps with communication. Provide the theory. Demonstrate technique. Make sure they know what to do to start. Most importantly, give them the tools to troubleshoot. I use that word, "Troubleshooting", and depending on the project give a simple checklist. "If it doesn't light up – 1. have you tested the circuit? 2. is the polarity correct? 3. Are your connections good?" I also believe it's important to talk about frustration. All makers know about frustration. Not everything works the first time. Learning how to recognize and deal with frustration is an important skill. So talk about it. Talk about taking a deep breath, a walk around the classroom, and giving yourself another chance. I also talk about collaboration and sharing. How the goal is not to finish the project first, but to all be successful. Then we break into smaller groups. This is key. Nobody should work alone, it's too easy for fear and frustration to build. And in smaller groups, nobody feels lost.

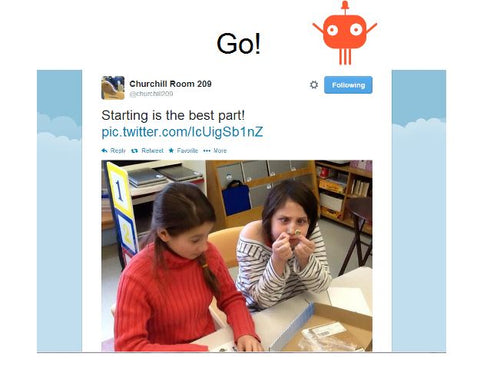
Go!
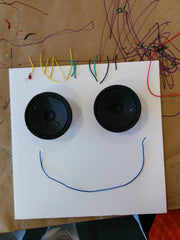
And finally, we're off. Hopefully, to a successful start. But not always. Beware the first 10minutes. This is where I take my deep breath as the chorus of "I don't know what to do's" and "Can you do this for me?" starts up around the classroom. But I push back, gently. I remind them what we've discussed. I demonstrate, repeatedly. If there is symmetry, I'll demonstrate one side, and tell the student to do the other. I most often answer a question with another question, or a "why don't you try that". I encourage exploration. And gradually, the room turns, and instead of "I need..." it's "come see". And that is when I gradually start exposing them to more. Maybe a tool they haven't seen before – wirestrippers are hugely fascinating. Maybe a type of circuit they could try on their next project – a parallel circuit means two LEDs and you can make a smiley face. Maybe sharing ideas between tables or of projects I've seen before. I talk about where to find the parts we're using, and what other things we can do with them. Because I want them to keep making. I want them to keep exploring.
That's a wrap!
And then we're done. Most classes end with some sort of wrap up. The teachers I work with call this consolidation. I love it. I love to hear what they've learnt. How they deal with frustration. Because we take these ideas and move on to the next classroom or the next library or the next workshop, and continue to encourage kids to keep learning, keep growing, and keep making.

Eureka! See what we've made this summer
 We've had a busy summer so far giving workshops in libraries as part of the
Eureka! TD Summer Reading Club
. We're not done yet! We have more to go - but we thought it would be great to share what we've made so far. Check our
schedule
to find a workshop near you.
We've had a busy summer so far giving workshops in libraries as part of the
Eureka! TD Summer Reading Club
. We're not done yet! We have more to go - but we thought it would be great to share what we've made so far. Check our
schedule
to find a workshop near you.
Bringing Making Out of the Makerspace: Part II
* This is an excerpt from a presentation I made at Maker Faire, in San Mateo, on May 18 called "Bringing Making Out of the Makerspace". I'll be posting excerpts from that presentation this summer. I started with this post, Part I *
Technique
As you can see from the projects I've shown so far, I have a heavy mix of traditional arts and crafts materials with some technical components worked in. That's intentional. I like to mix the familiar with something new. The idea is for kids to say "I can do that". "I can paint". The familiar, the kids can handle on their own, and it gives them confidence. It's important to reaffirm the familiar – it's paint, you've painted before, right? The familiar brings confidence. The new – I demonstrate. I demonstrate to the kids, to the teachers, and any volunteers in the classroom. Then we practice. We light up LEDs. Then we test as we go.

These cards are a great example. This was project with a Primary Maker Club at a local elementary school. They're the Dunlop Dragons – so I put a dragon on the card. This looks like a colouring project, they've done that a million times before. The schematic – definitely new. The construction paper switch? No problem. Painting? Easy. The hardest part of this project is getting the positive and negative legs of LED lined up correctly with the battery. So first, we play with the battery and the LED. I show them how to light up the LED. I ask them to light up their LED just on the battery. Then we put in the card. Next – we test it. Using wires, and a buddy, we make a circuit to see if the LED lights up. Then we paint the circuit carefully. Painting is no problem. How to paint carefully – that is something they are already learning. And we can talk them through what is required to paint carefully to make a circuit.
Prep
Okay, so lets get ready. Sometimes, when I visit a class, I have 50 minutes. Sometimes, if I'm coming in for a recess program, I'll have 40. And sometimes – I'll have 25min. As far as supplies go, it's better to have more rather than less. I don't assume they have anything. But I have also found that it is crucial not to spend time handing out parts. I will pre-package everything they need into supply boxes and carry extras with me to use as required. This limits the time we spend getting everything handed out and maximizes the time they spend making.

For supply boxes I use these 8 1/2" x 11" copy boxes from my local office supply store. I stick a page protector on the front for any instructions or visual aids they might need, and I load up the boxes with the tools and components required for them to start working.
I also spend time prepping for a successful start. It's important that the kids start their projects successfully. A successful start means everyone can get started right away – and then we deal with the problems when they come up. The Prep work I do for one of our Break and Make workshops is a good example of this. These are the workshops where we take things apart. I go through each piece, make sure the first layer of screws are loose, and package it with the right screwdriver. I keep a bigger box of tools that the kids can come look through as they need to, but at least they can get started right away. That's one of my goals of prepwork.
* The next post in the series is here, Part III. *